Welcome to Blackboard Faculty Support!
If you have any questions, please contact the Academic Instructional Technology Center at asaitc@adams.edu or 719-587-7371.
Can’t find what you’re looking for?
Submit a question here!
🔍How to search this page
- 💻CTRL+F (PC) CMND+F (Mac)
- 📱three dots on browser’s upper right → Find in page
Search, filter, access all video tutorials and documents.
Blackboard Ultra
FAQs
Can’t find what you’re looking for?
Submit a question here!
Hide students in the Gradebook who are no longer in my course?
How do I hide students in the Gradebook who are no longer in my course?
Yes! Go to the Gradebook then click the gear icon on the right side of the navigation bar to open the Gradebook Settings panel. Scroll down to Students Visibility and toggle to activate the setting.
Hide students in my downloaded Gradebook?
How do I hide students in my downloaded Gradebook?
→First, set up your working Gradebook file in your spreadsheet program:
- In Ultra, download the Full Gradebook. Under Record Details choose Select All Items. Leave all other options on their default.
- Open the downloaded Gradebook in your spreadsheet program. This will serve as your working Gradebook file.
- Hide the rows of students who no longer have access to the course. In Excel and Google Sheets, right click on a row and select Hide or Hide row. Here’s how to do this in Numbers.
→When you want to update the Gradebook in your spreadsheet program:
- Download the desired content from the Gradebook.
- Open the downloaded file.
- Copy and paste the appropriate columns into your working Gradebook file. Your working Gradebook file will automatically place data for students who no longer have access to the course into their hidden rows, so you can navigate your working Gradebook file as though it only contained students with access to the course.
OCR a scanned PDF?
How do I OCR a scanned PDF?
You can use the Ally File Transformer within Blackboard to OCR scanned pdfs:
- Select Assist in the base navigation menu
- Scroll down to Ally File Transformer
- Upload your file then select OCRed PDF
Note: This works well for smaller files. For larger files:
- First check to see if there’s already an accessible digital copy available online
- You can scan then OCR documents at the Nielsen Library (bring a USB drive)
Please also see the Ultra Migration Session Recordings within Blackboard on the Institution Page, and the following resources:
Add an additional attempt on a test or assignment?
Add an additional attempt on a test or assignment for a student?
Go to the Gradebook, then the Grades view. Click on the cell for that student’s submission, then from the dropdown menu, select Add or edit exceptions. Scroll down to Attempts allowed then use the dropdown menu to change the number of possible attempts for that student. Last, click Save. The student’s cell for the assignment should now display the dashed-clock exception icon.
Students can't see their grades or my feedback?
Why can’t my students see their grades or my feedback?
Usually this is because a grade hasn’t been posted yet. To check, go to the Gradebook then to the Overview tab. Scroll down to the Needs Posting section. If any items are listed here, click the Post Now button to make grades and feedback for those assignments visible to students.
You can also make sure the assignment itself is visible to students by going to the Gradebook and to the Gradable Items tab. Click the three dots next to an item and select Edit. In the upper right corner, use the dropdown menu check the assessment’s visibility settings.
Grades aren't posting automatically?
Why aren’t my grades posting automatically?
→Check the setting: open the assessment from the Content page, then click its gear icon to access the settings panel. Scroll down to Grading & Submissions and select the Post assessment grades automatically checkbox, then click Save.
→If the setting is grayed out or you don’t see it, then the assessment may be incompatible with automatic grade posting. Common examples include assignments with rubrics, discussions and journals, as well as columns created in the gradebook.
Time zone in Blackboard Ultra?
How do I set the time zone in Blackboard Ultra?
There is no time zone setting in Ultra because Ultra automatically displays the user’s time zone. Here are some examples in the Ultra Time Zone guide. You can also use this time zone calculator for MST/MDT and your local time.
Edit due dates and release conditions at the same time?
What’s the most efficient way to edit due dates and release conditions?
Important: Do not delete due dates or release conditions before using Batch Edit. This tool can only change existing date information.
To access Batch Edit:
1. Go to the Content page.
2. Parallel to the Course Content heading, look on the right for the three dots next to the magnifying glass.
3. Click the three dots then select Batch Edit from the dropdown menu.
To edit dates with Batch Edit:
1. Click on modules or folders to open them.
2. Use the checkboxes to select items
3. Click the Edit dates button at the bottom of the screen to change release condition dates and due dates simultaneously.
Still need help?
Submit a question here!
Training, Session Recordings, Sandboxes
Trainings & Session Recordings
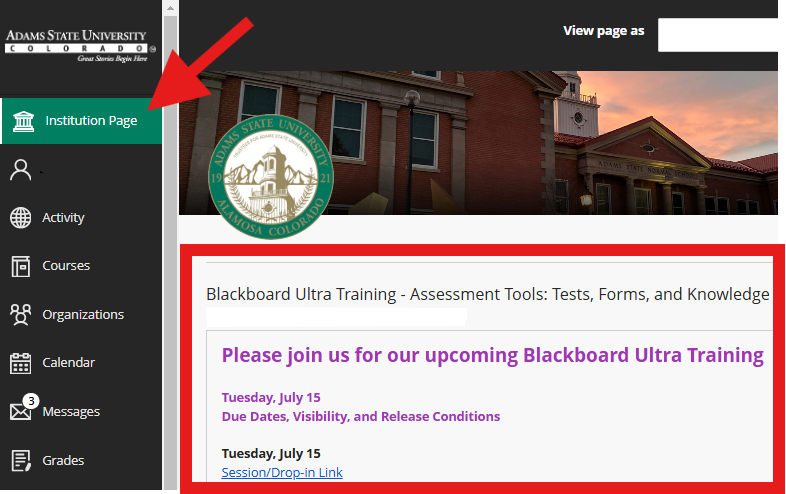
Find information on upcoming trainings by logging into Blackboard then scrolling through the Institution Page. You can also find recordings on this page under Blackboard Ultra Migration Session Recordings. If you’d like more help, contact our trainer, Dr. Chelsea Oden.
Sandboxes
Educational and interactive sandbox shells are available to instructors who want hands-on practice and space to experiment with features in Ultra. Please contact our trainer to learn about specific availability!
Getting Started in Ultra
- Ultra vs. Original: Quick Comparison (Video)
- Updated Terminology in Ultra
- Time Zones and Dates
- Question Types in Ultra and Original (Google Slides)
- Profile and Notification Settings (Google Slides)
Creating and Organizing Content
General
- Upload a Syllabus (Video) (Doc)
- Review and Reupload a Syllabus (Video)
- Add the “Additional Course Expectations and Information” document
- Create a Learning Module (Video) (Doc)
- Clip: Add Content to a Learning Module
- Clip: Add a Web Link or Course Link
- Generate Learning Modules (Google Slides)
- Date-Release Learning Modules (Video) (Doc)
- Move Content (Drag and Drop) (Video does not contain audio)
- Release Content by Date
- Release Content for a Student or Group
- Create an Ultra Document (Video) (Doc)
- Use the Content Editor (Video)
- Progress Tracking
Adding Media
Other
Accessibility & Ally
General
- Improve Content Accessibility in Blackboard
- Get a Course Accessibility Report (Video) (Doc)
- Get Started with Ally (Video)
- This video shows the Original course view, but the basic mechanics are still relevant in Ultra.
- Download Alternative Formats (Video)
- This video shows the Original course view, but the basic mechanics are still relevant in Ultra.
- Accessibility Checklist (PDF)
- WCAG 2.1 AA Requirements Cheat Sheet
Text
- Accessible Lists (Video) (Doc)
- Headings (Video) (Doc)
- Handwritten Notes
- Insufficient Contrast: Find and Replace Text Color in Microsoft Word
PDFs
- OCR Scanned PDFs (Video) (Doc)
- Untagged PDFs
- PDFs Missing Headings
Images
- Alt Text: Images without Description (Video) (Doc)
- Image Captions in Word Processors
- QR Codes
Videos
Discipline-Specific
- Art: Contextual Image Description
- Computer Science: Adding Code Snippets
- Music: Scanned Music Notation
- STEM: Handwritten Notes
- STEM: Diagrams and Graphs
- STEM: Equations in Ultra – LaTeX
- STEM: Math Editor in Ultra
Assessments
- Create an Assignment (Video) (Written Instructions)
- Create a Discussion
- Generate Journal Prompts (Google Slides)
- Create a Test (Video)
- Create a Rubric (Video)
- Set Up AI Conversations (Google Slides)
- Set Up and Assigning Groups
- Achievements (Badges)
- Progress Tracking
Gradebook and Grading
- Set Up the Overall Grade
- Set Up a Weighted Grade
- Create and Organize Gradebook Items
- Checking Overall Grade Setup (Video)
- Grade (Video)
- How to Tell if Grades are Posted
- Automations
Communication and Interaction
- Post Announcements (Video)
- Use Messages (Video)
- Automations
- Navigate Discussions (Video)
- Set Up and Assign Groups
- Class for Zoom (Quick Start)
- Downloading Recordings from Class Collaborate
And More…
Checklists & Strategies
ePortfolio
Blackboard Original
Have a question about Blackboard Original?
While we have fully moved to Blackboard Ultra, you may have archived courses in Blackboard Original. Those courses become Read Only December 2026.
The following resources will be available until that time.
Understanding & Building Your Course
Understanding & Building Your Course
Working in the Course Environment
- Your Course Environment
- Uploading One or More Files to Your Course
- Adding an Avatar to Personalize Your Course Environment
- Making Your Course Available to Students (PDF)
- Hiding Courses From your Course List (PDF)
- Edit Notification Settings
- Course to Course Navigation
- Changing the Landing Page for your Course (PDF)
- Viewing Your Course as a Student (PDF)
- My Blackboard Profile
- The Retention Center
- Using the Calendar Tool
Building Course Content
- Creating an Announcement
- Adding a PDF Syllabus to Your Course (PDF)
- Creating a Learning Module and Adding PDF files (PDF)
- Linking Activities within a Learning Module
- Editing the Course Home Page
- Adding a URL
- Creating a Mashup
- Adaptive Release
- Creating Accessible Course Content
- Using the Content Editor (PDF)
Reporting and Course Utilities
Blackboard Ally
- Accessible Documents Checklist (PDF)
- Getting Started with Ally
- Accessing Alternative Formats with Ally
- Ally Alternative Formats
- Ally Course Accessibility Reports
Communicating and Collaborating
Communicating and Collaborating
Messaging
Discussions
- Creating a Discussion Forum (PDF)
- Creating a Discussion Thread (PDF)
- Replying to a Discussion Thread (PDF)
- Grading Discussion Forums with a Rubric
- Interacting with the Discussion Board
Blogs, Journals, & Wikis
- Creating a Blog
- Creating and Editing Blog Entries
- Commenting on a Blog Entry
- Grading Blog Entries
- Creating a Journal
- Creating a Wiki
Using Collaborate Ultra (Video Conferencing)
- How to Create a Collaborate Ultra Session (PDF)
- Blackboard Collaborate Ultra – Join and Feeds (PDF)
- How To load a PowerPoint presentation Using File Sharing on Collaborate Ultra (PDF)
- How To load a PowerPoint presentation Using Application Sharing on Collaborate Ultra in Chrome (PDF)
- How To load a PowerPoint presentation Using Application Sharing on Collaborate Ultra – Firefox (PDF)
- How to record a Collaborate Ultra room (PDF)
Using Kaltura (Lecture Capture)
Assessing Learners
Assessing Learners
Assignments
- Getting Started with Assignments (PDF)
- Creating an Assignment
- Downloading Assignments
- Grading Assignments with Blackboard Annotate
Blackboard Outcomes
- Adding a Secondary Evaluation Rubric
- Adding Outcome Alignments to an Assignment
- Instructions for External Evaluation (PDF)
- Using a Secondary evaluation Rubric
Tests, Surveys, & Pools
- Building a Question Pool (Database)
- Creating a Test
- Setting Test Options (includes setting the timer for a test)
- Reading Survey Results
- Exporting/Importing Test (PDF)
- Uploading Test Questions from Microsoft® Excel
- Creating a Fill in the Blank Question
- Creating a Short Answer Question
- Creating a Matching Question
- Creating a True or False Question
- Adding an Existing Question to a Test
- Creating a Calculated Formula Question
- Creating a Calculated Numeric Question
- Creating an Essay Question
- Creating a Fill in Multiple Blanks Question
- Creating a Hot Spot Question
- Creating a Jumbled Question
- Creating a Likert Question
- Creating a Multiple Answer Question
- Creating a Multiple Choice Question
- Creating an Ordering Question
- Creating a Quiz Bowl Question
- Adding Test Availability Exceptions
Grade Center
- Getting Started with Grade Center (PDF)
- Customizing the Grade Center View
- Creating Smart Views
- Keeping Student Names Anonymous When Grading Tests
- Creating a Grade Center Report
- Creating a Grading Rubric
- Exporting/Importing a Rubric
- Associating a Rubric with a Gradable Item
- Grading with Rubrics
- Providing Audio and Video Feedback to Students
- Color Code the Grade Center
- Working Offline with the Grade Center
- Dropping Lowest Grade (PDF)
- Grading Assessments (PDF)
- Weighting Your Grades in Blackboard
Student Performance
Honorlock Help